Webflow for Landing Pages: Complete Guide 2026
Create landing pages that work! Learn how Webflow can help you design high-converting pages with ease and boost your lead gen strategy.

Actionable insights to improve SEO, speed, and conversions

Building captivating websites with Webflow is one thing, but understanding how users interact with your digital masterpiece is quite another. That's where Google Analytics 4 (GA4) comes in, offering a revolutionary approach to Webflow analytics for the future.
Ready to unlock the insights hidden within your Webflow site? Buckle up, data explorers, because this guide will navigate you through the seamless integration of GA4 with your favorite website builder. Learn how to add Google Analytics to Webflow for comprehensive data tracking and analysis.
This blog will guide you through the process of adding Google Analytics (GA4) to your Webflow website, ensuring you're equipped to make data-driven decisions for your online presence.
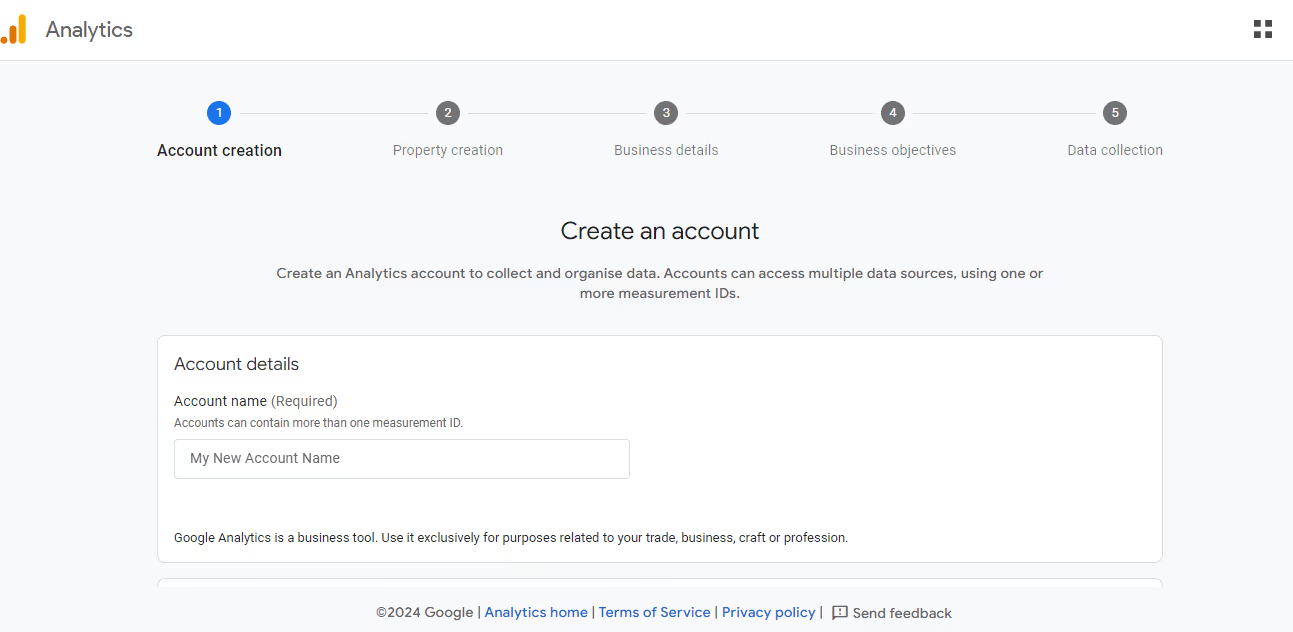
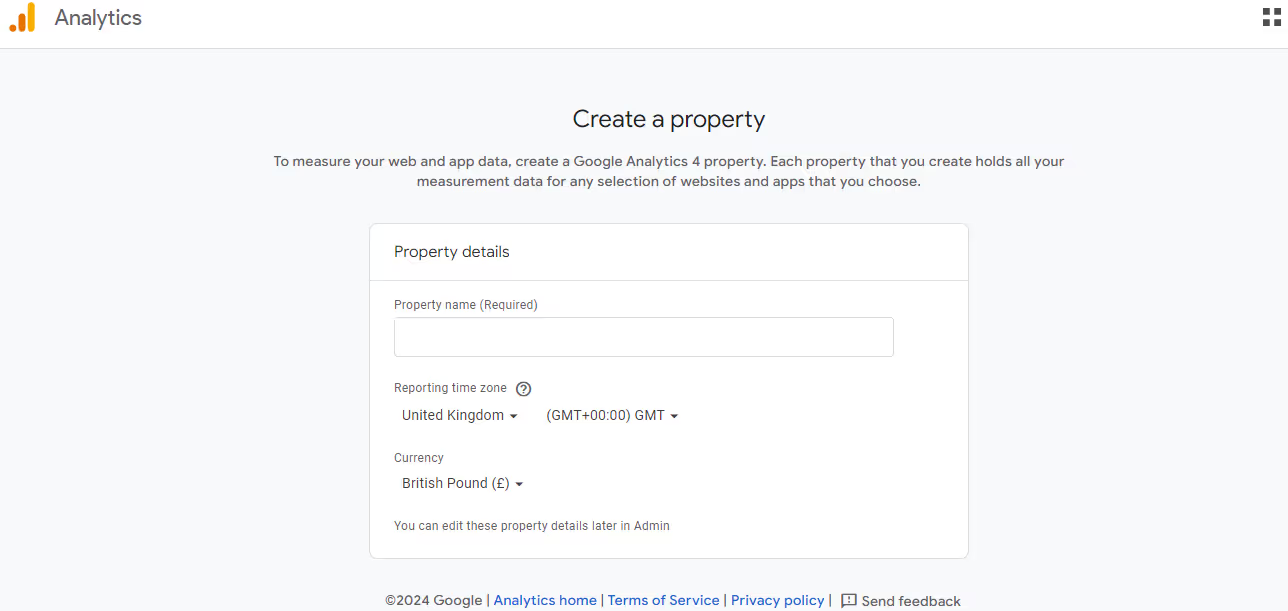
1. Accessing Webflow Dashboard
Logging In: Sign in to your Webflow account and select the project where you want to add Google Analytics.
is Select Project: Choose the project you wish to integrate with Google Analytics.
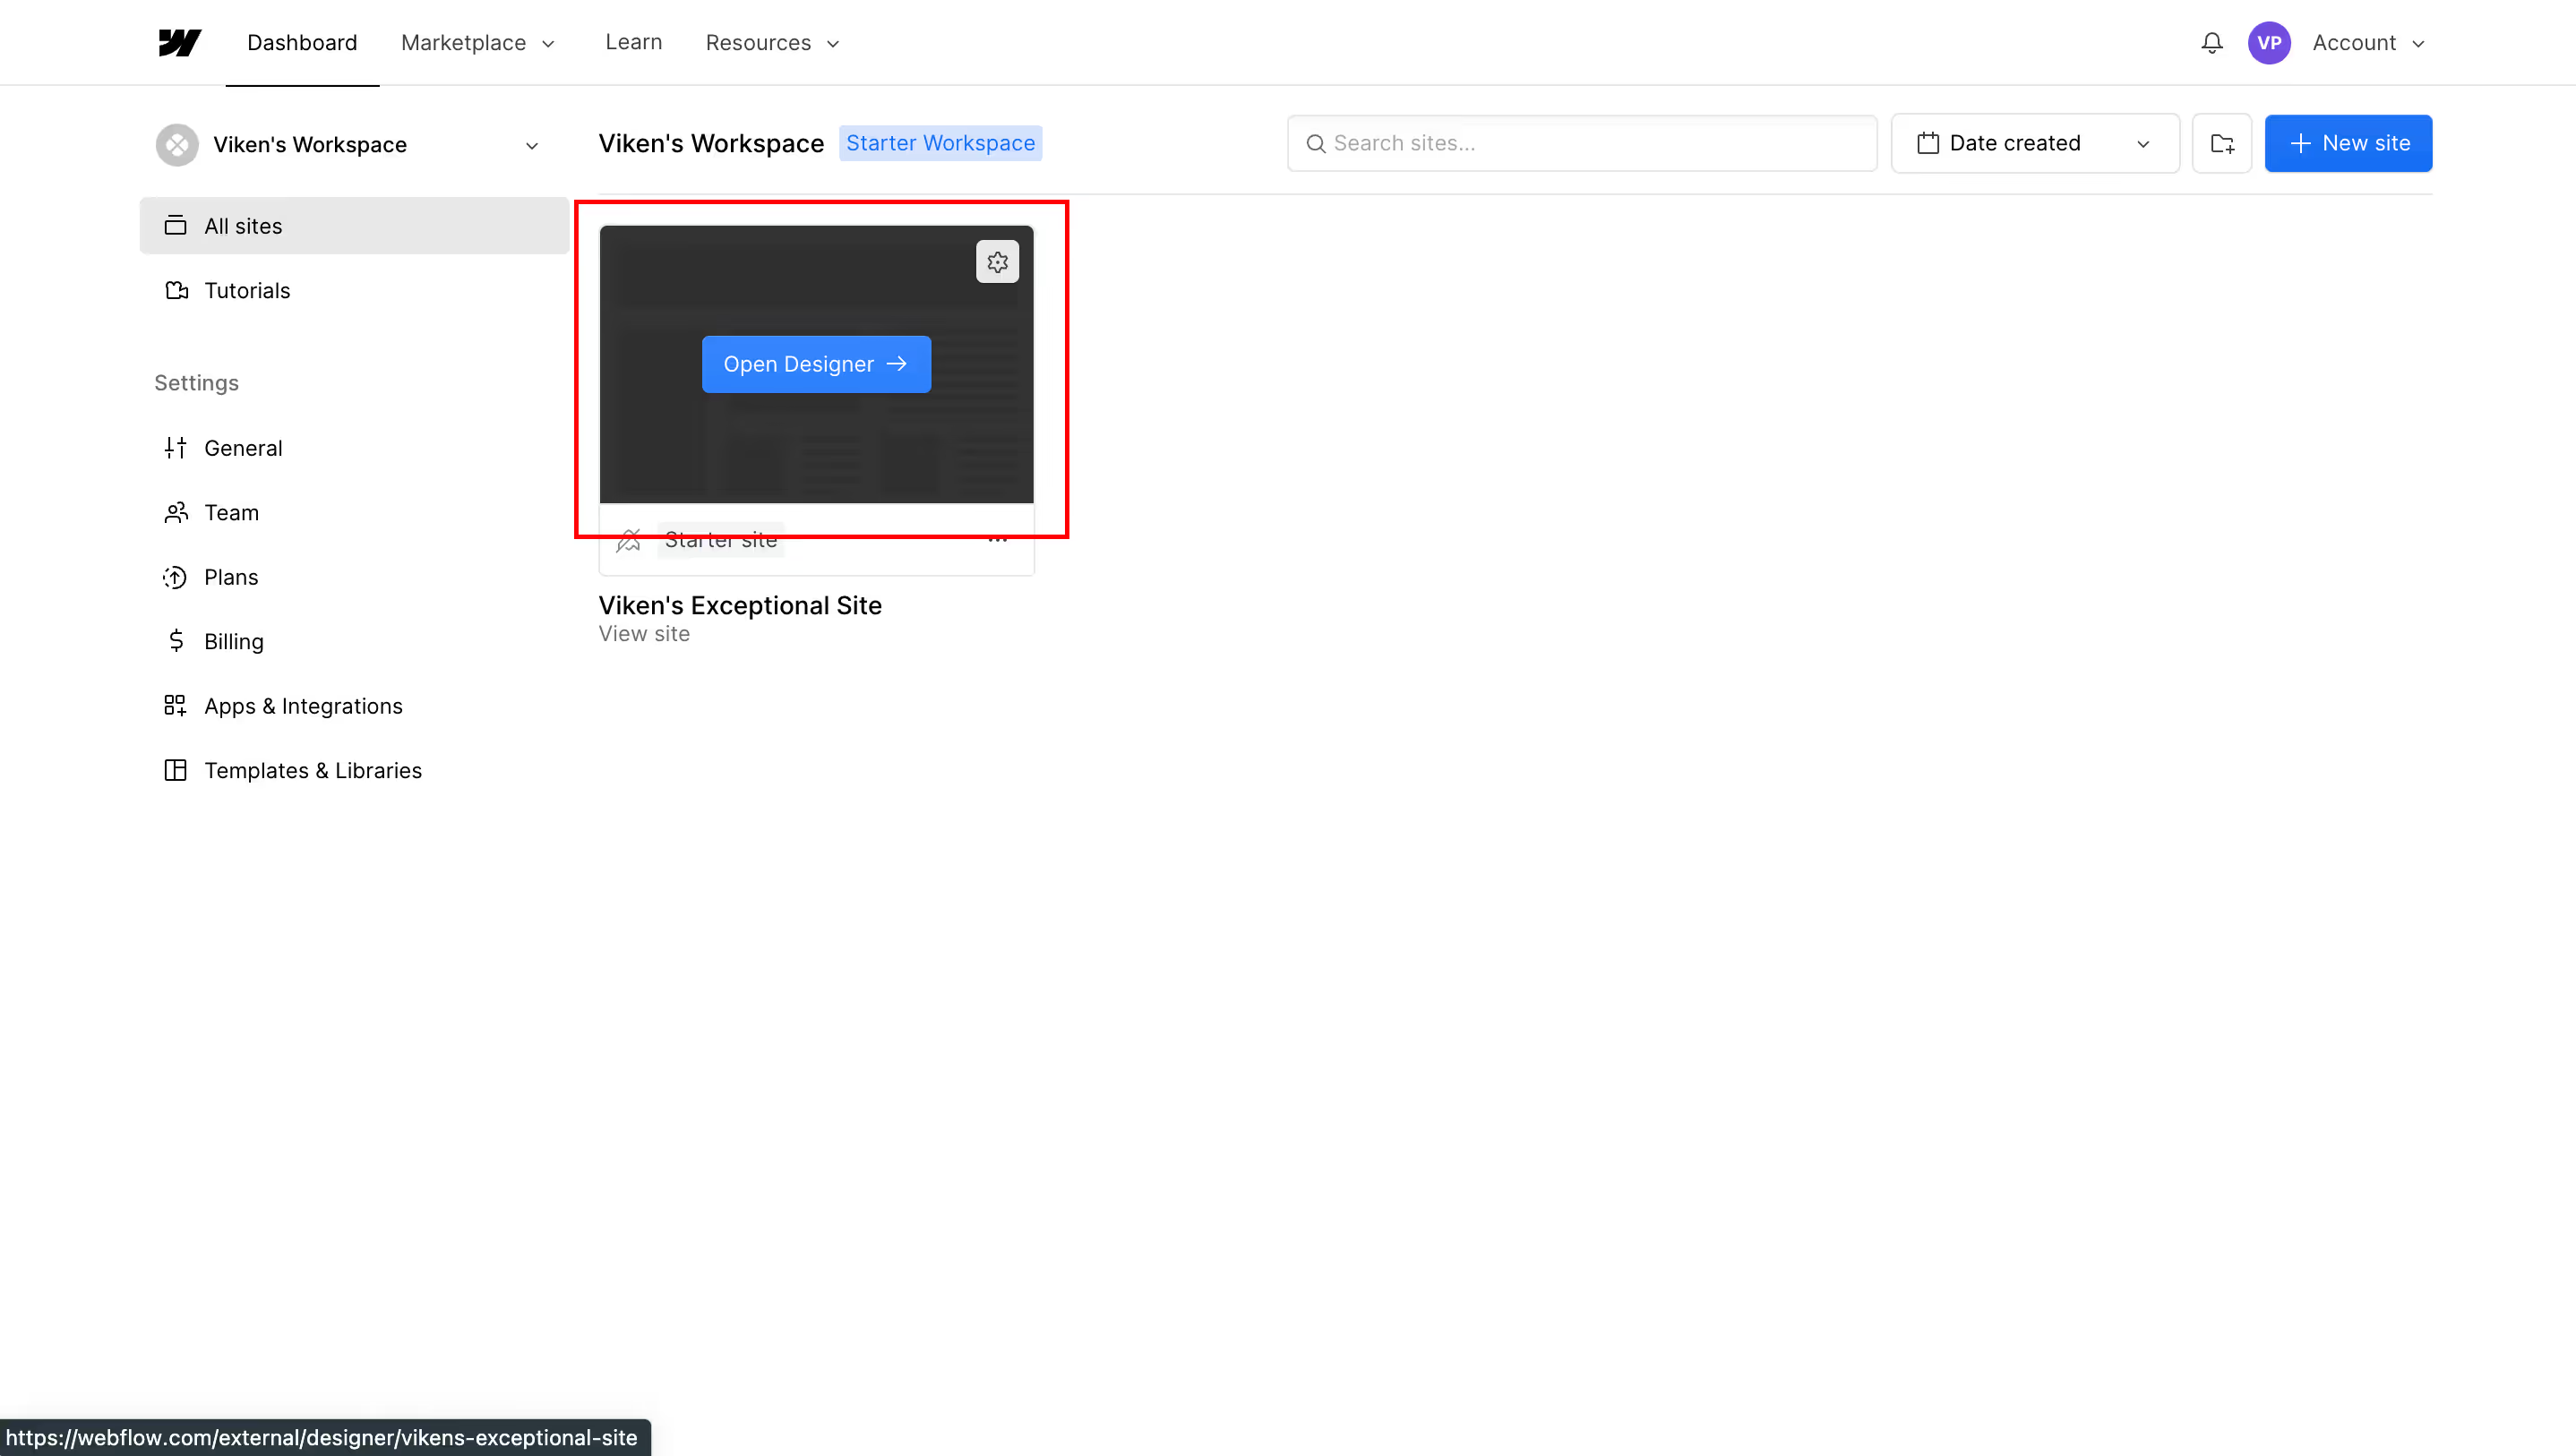
2. Add Google Analytics to Webflow
Project Settings: In your Webflow dashboard, go to the project settings of the selected project.
Integrating Tracking Code: Under the ‘Custom Code’ tab in project settings, paste your Google Analytics Tracking ID in the Head Code section.
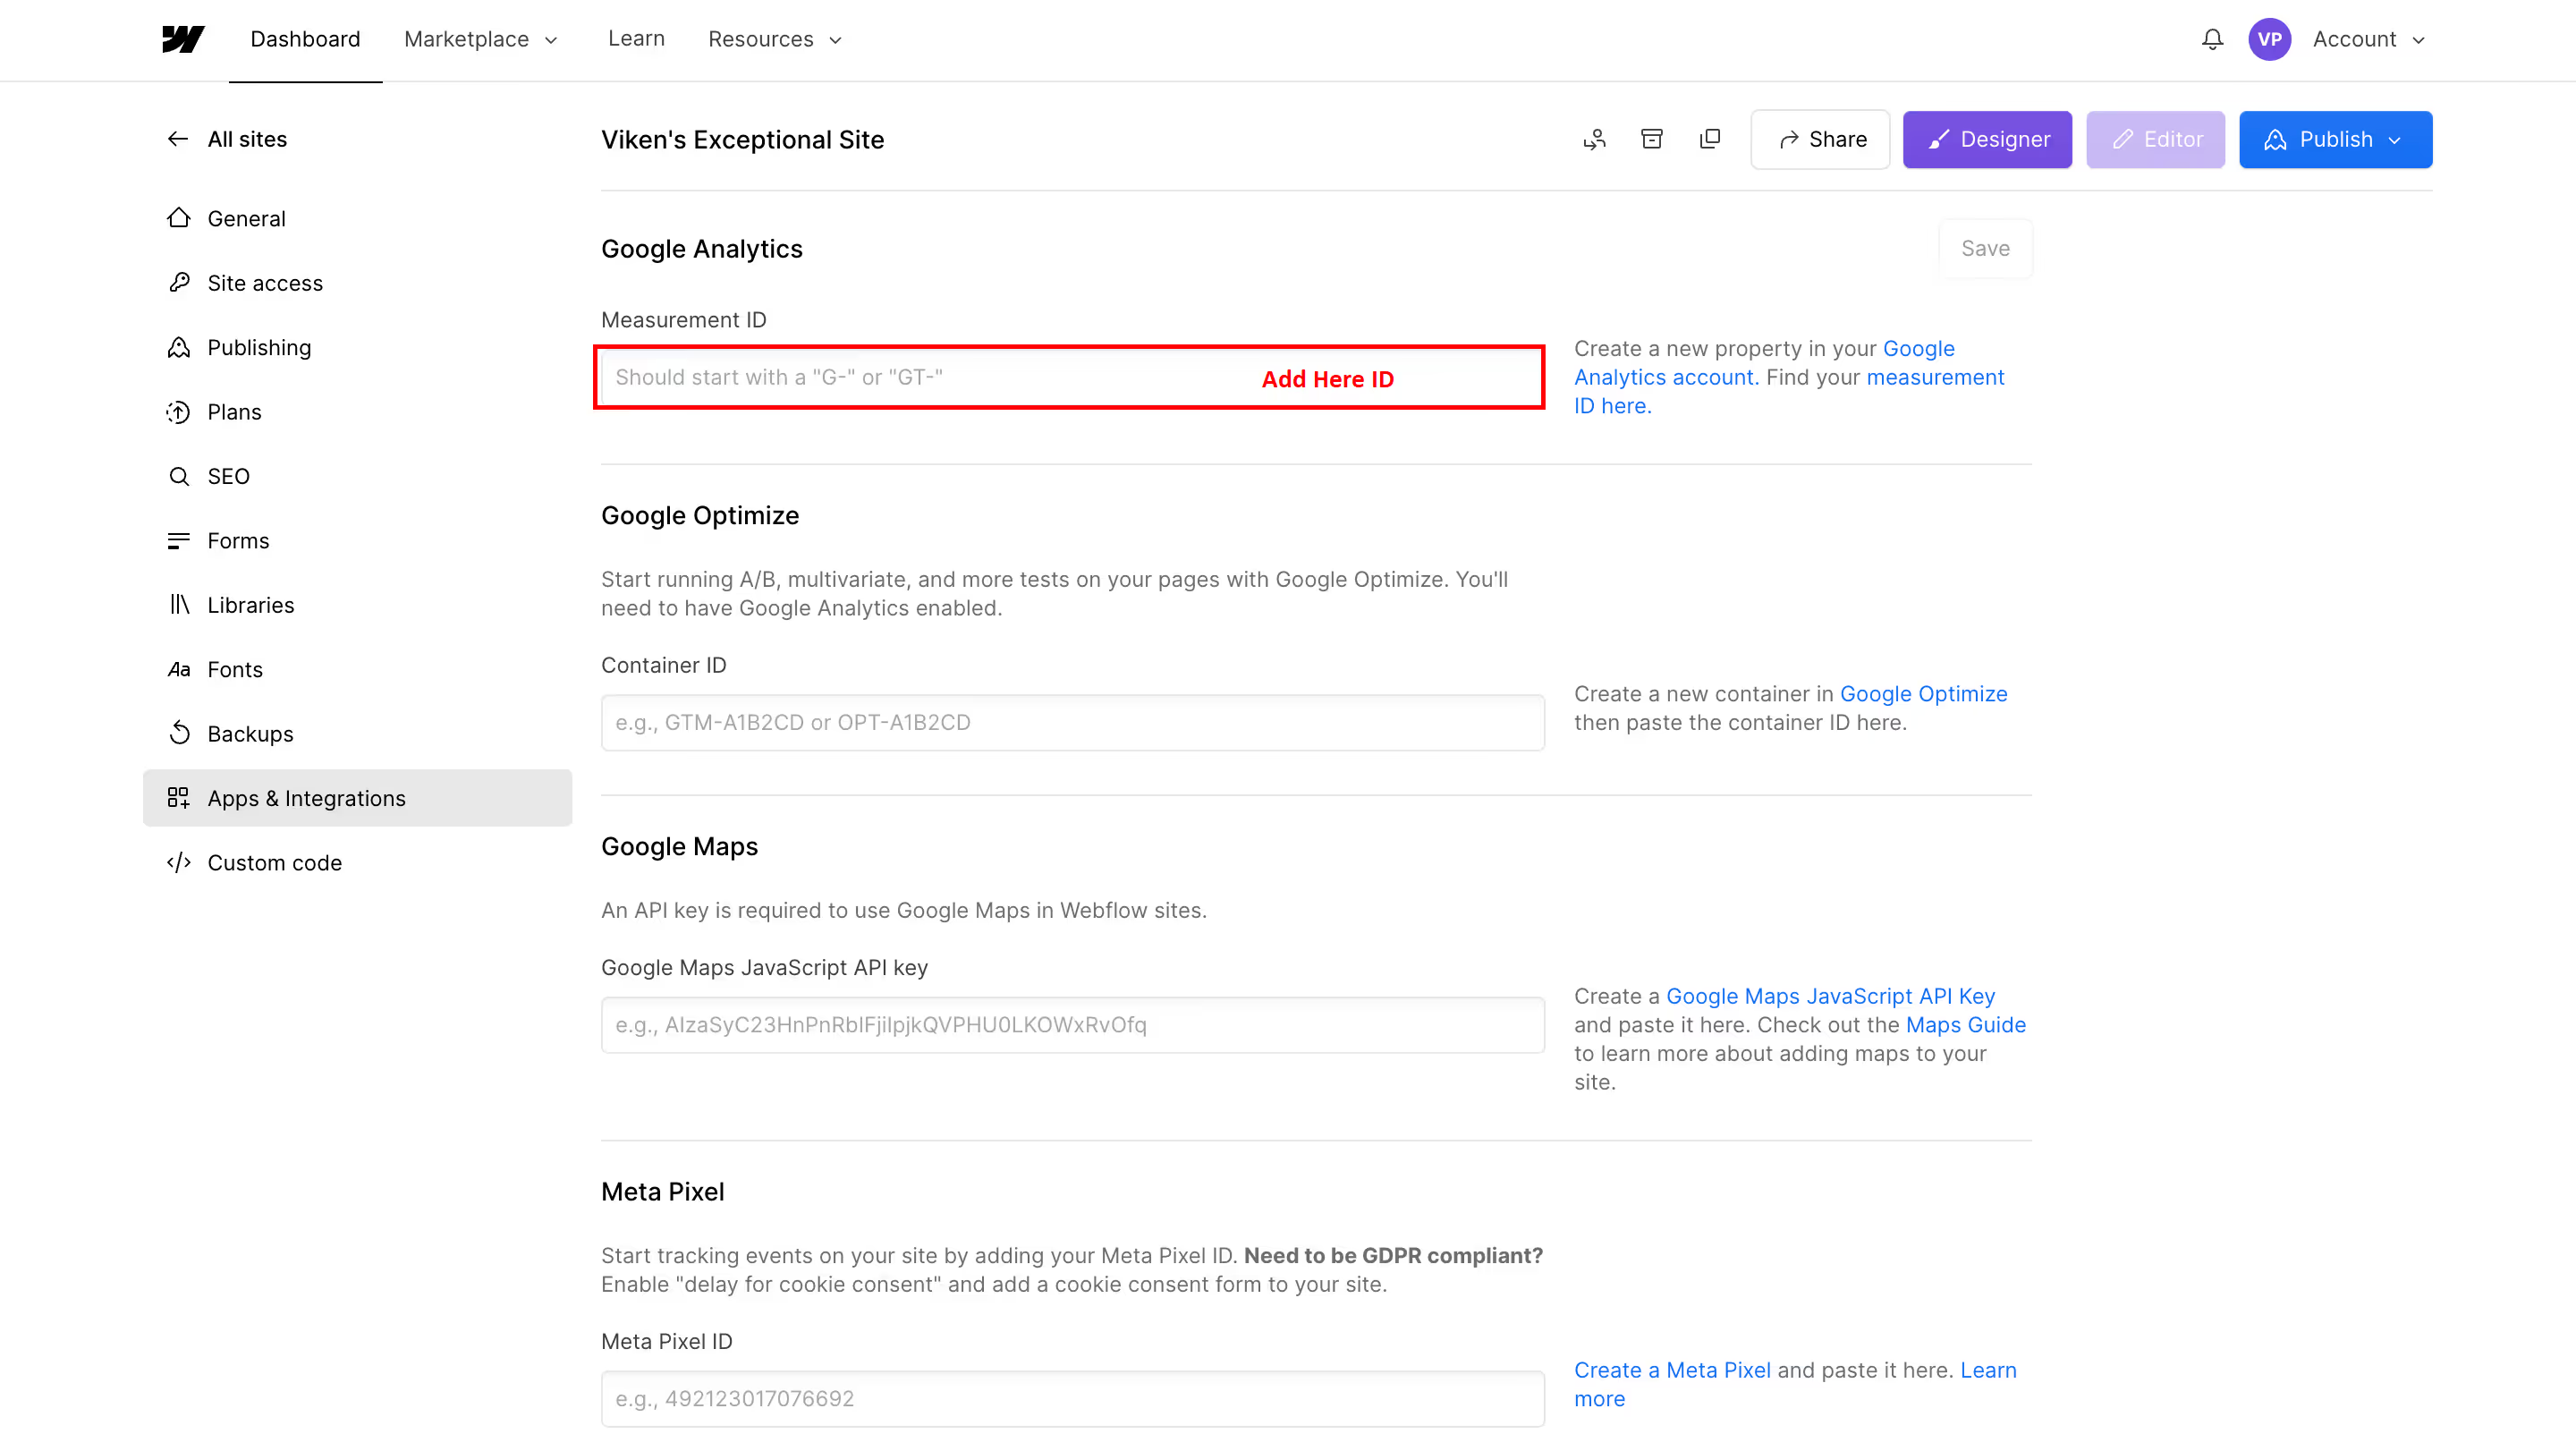
Did you publish your changes? Fantastic! Now, let's see if the data river is flowing:
Head back to Google Analytics and open the "Real-time" section. Within a few minutes, you should see your website visitors actively exploring your digital domain. If not, don't panic, we'll troubleshoot later.
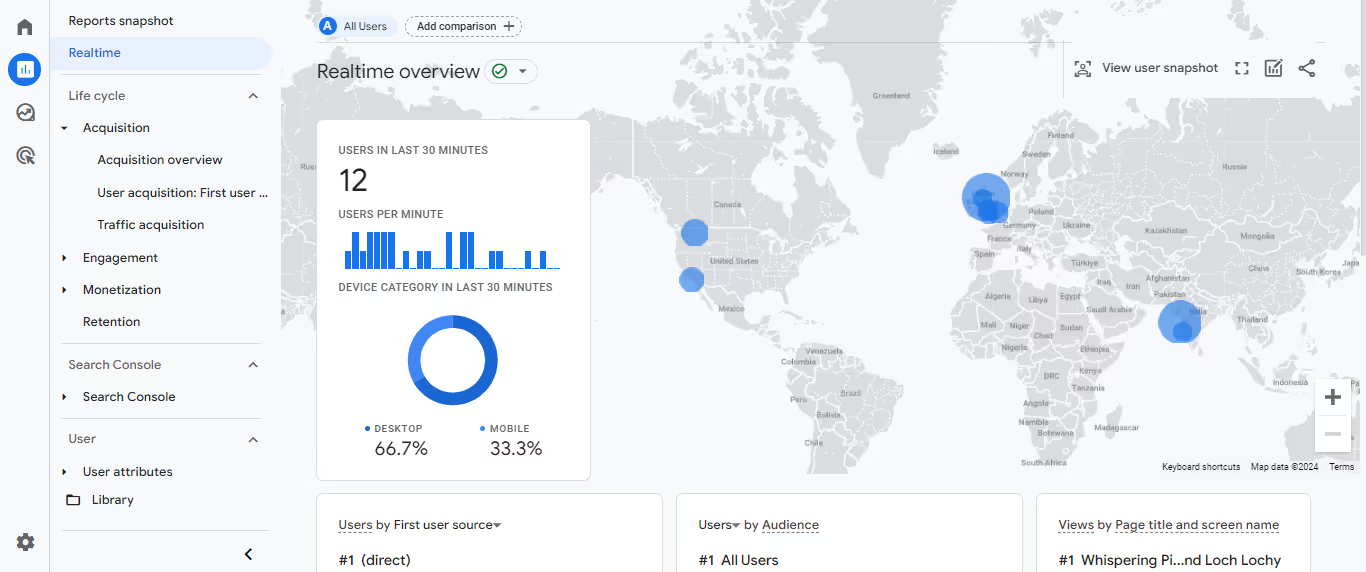
Congratulations! You've integrated GA4 with your Webflow site. Time to delve into the data ocean!
GA4 unlocks a whole new world of data possibilities. Let's customize your experience:
In GA4, conversion events can include various user interactions, such as:
1. Purchase Completion
2. Form Submission
3. Page View
4. Video View
5. App Interactions
The key difference in GA4 compared to its Universal Analytics is the emphasis on events as the primary data model. GA4 allows more flexibility in defining events, offering a broader and more customizable approach to tracking user interactions and conversions.
By setting up and tracking conversion events, businesses can gain insights into user behavior, optimize their digital strategy, and understand the effectiveness of specific actions on their site or app.
No data integration is perfect, but we've got your back:
Remember: Accurate data collection is key. So, test thoroughly, address any issues, and ensure your Webflow site and GA4 are in perfect harmony.
Want to become a GA4 Jedi Master? Consider these options:
With GA4 as your sidekick, your Webflow site will be more than just a pretty face - it'll be a data-powered masterpiece, attracting visitors, converting leads, and dominating the digital landscape.
Now go forth, brave data explorer, and unlock the future of insights within your website!
Integrating Google Analytics with your Webflow site is a strategic step towards understanding and optimizing your website’s performance.
By following these detailed steps of Webflow google analytics integration, you can ensure that your Webflow project is fully equipped with the powerful analytics tools Google offers, setting the stage for informed decision-making and a data-driven approach to your online presence.
Recommended to Read: How to connect webflow form to hubspot
Google Analytics 4 (GA4) is the latest version of Google Analytics, offering advanced features for tracking user interactions on your website. It provides valuable insights into user behavior, helping you optimize your Webflow site for better performance.
While not mandatory, upgrading to GA4 is recommended as it introduces enhanced tracking capabilities and aligns with the evolving digital landscape. Transitioning ensures your Webflow site benefits from the latest analytics features.
The process includes creating a GA4 property, obtaining the tracking code, and integrating it into your Webflow project. This blog guide provides step-by-step instructions to seamlessly add GA4 to your Webflow website.
Webflow supports both Universal Analytics and GA4. While Universal Analytics will remain functional, transitioning to GA4 is recommended for long-term compatibility and access to advanced analytics features.
No coding skills are required. The guide simplifies the process, offering a user-friendly approach to adding GA4 to your Webflow site. Follow the step-by-step instructions, and you'll seamlessly integrate the analytics tracking.
Data visibility in GA4 depends on website traffic. Generally, it may take a few hours to a day for the initial data to appear. As traffic increases, GA4 provides comprehensive insights into user interactions on your Webflow site.
Yes, theCSS Agency provides support. If you encounter any challenges or have questions during the GA4 integration process on your Webflow site, feel free to reach out for assistance.

Create landing pages that work! Learn how Webflow can help you design high-converting pages with ease and boost your lead gen strategy.
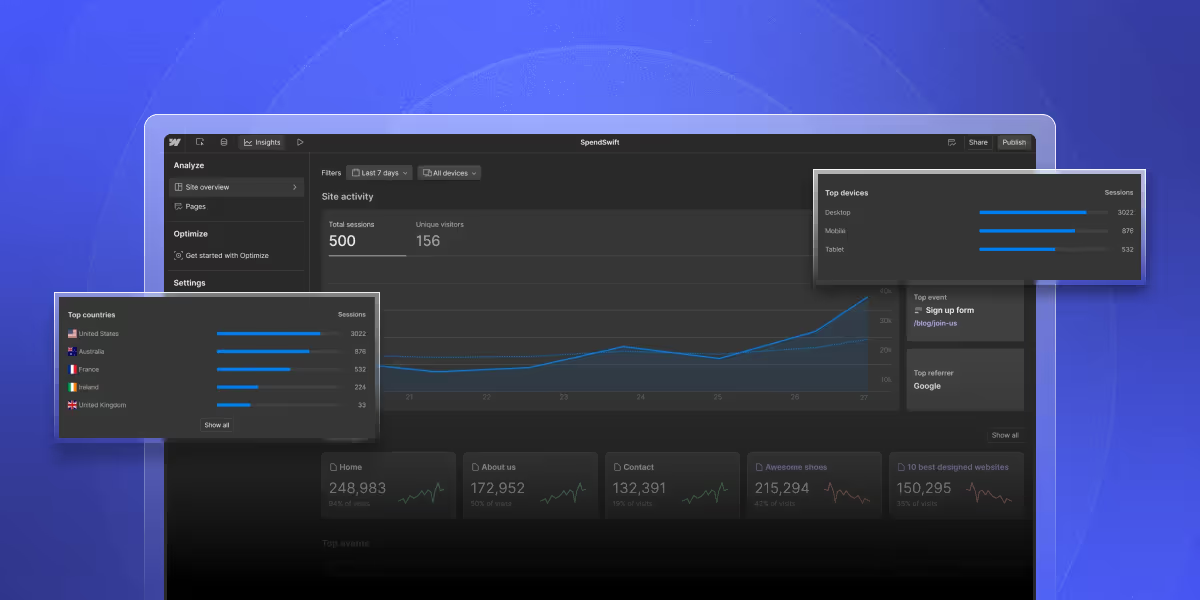
Webflow Analyze & optimize redefines site analytics for Webflow users with privacy-first data and code-free setup. Learn more!
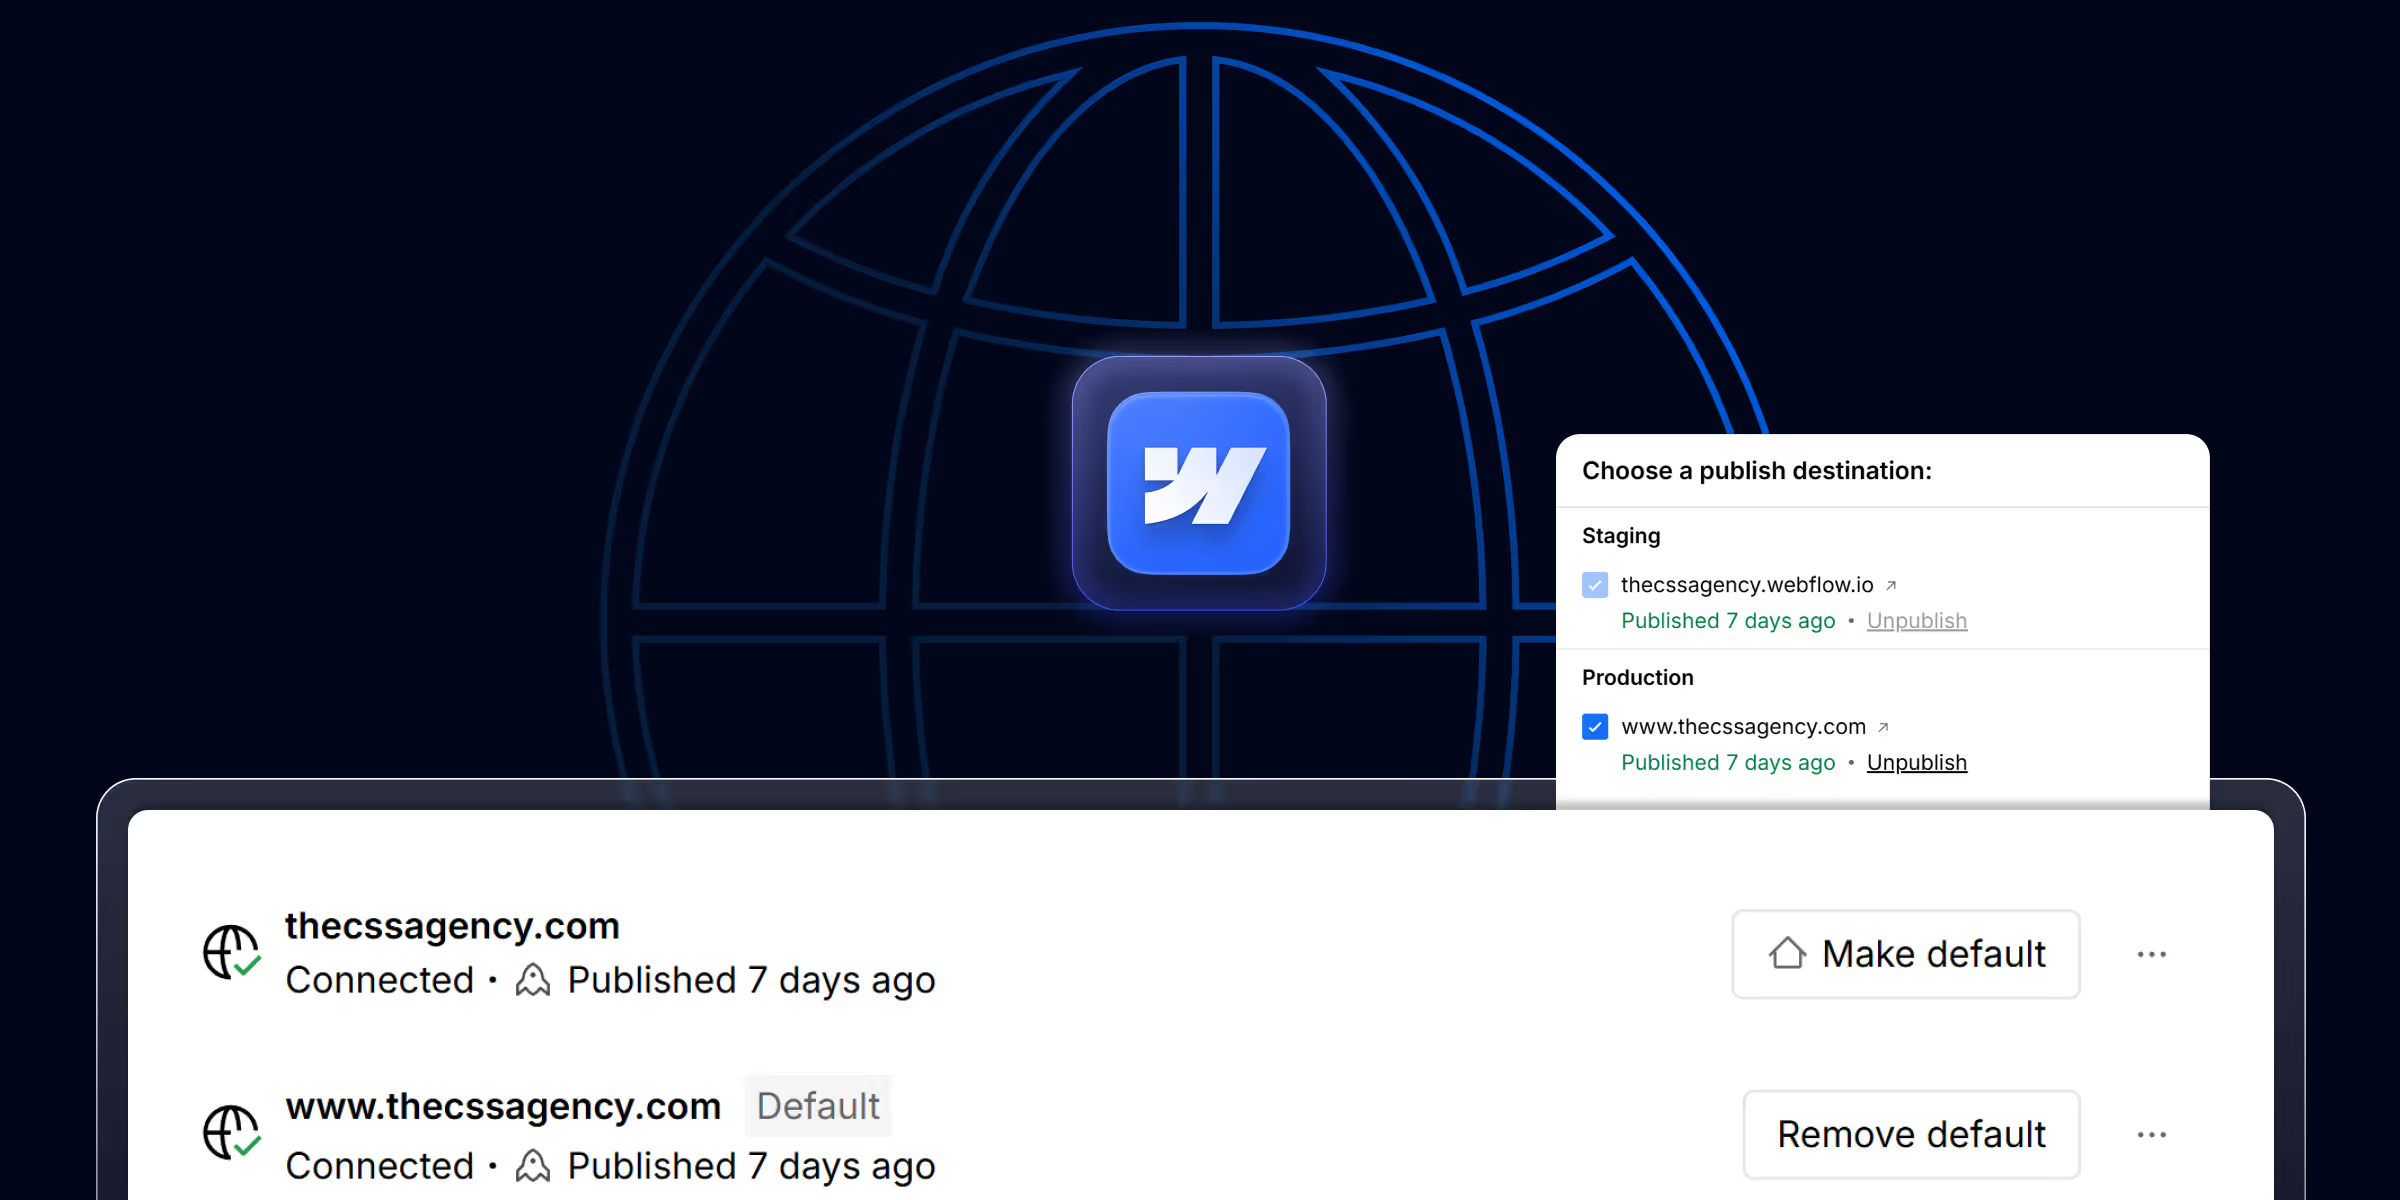
Learn how to connect your Webflow website to a custom domain in this easy step-by-step guide. Perfect for beginners in 2026.
Quick Turnaround. No Contracts. Cancel Anytime. Book a 30 minutes consulting call with our expert.